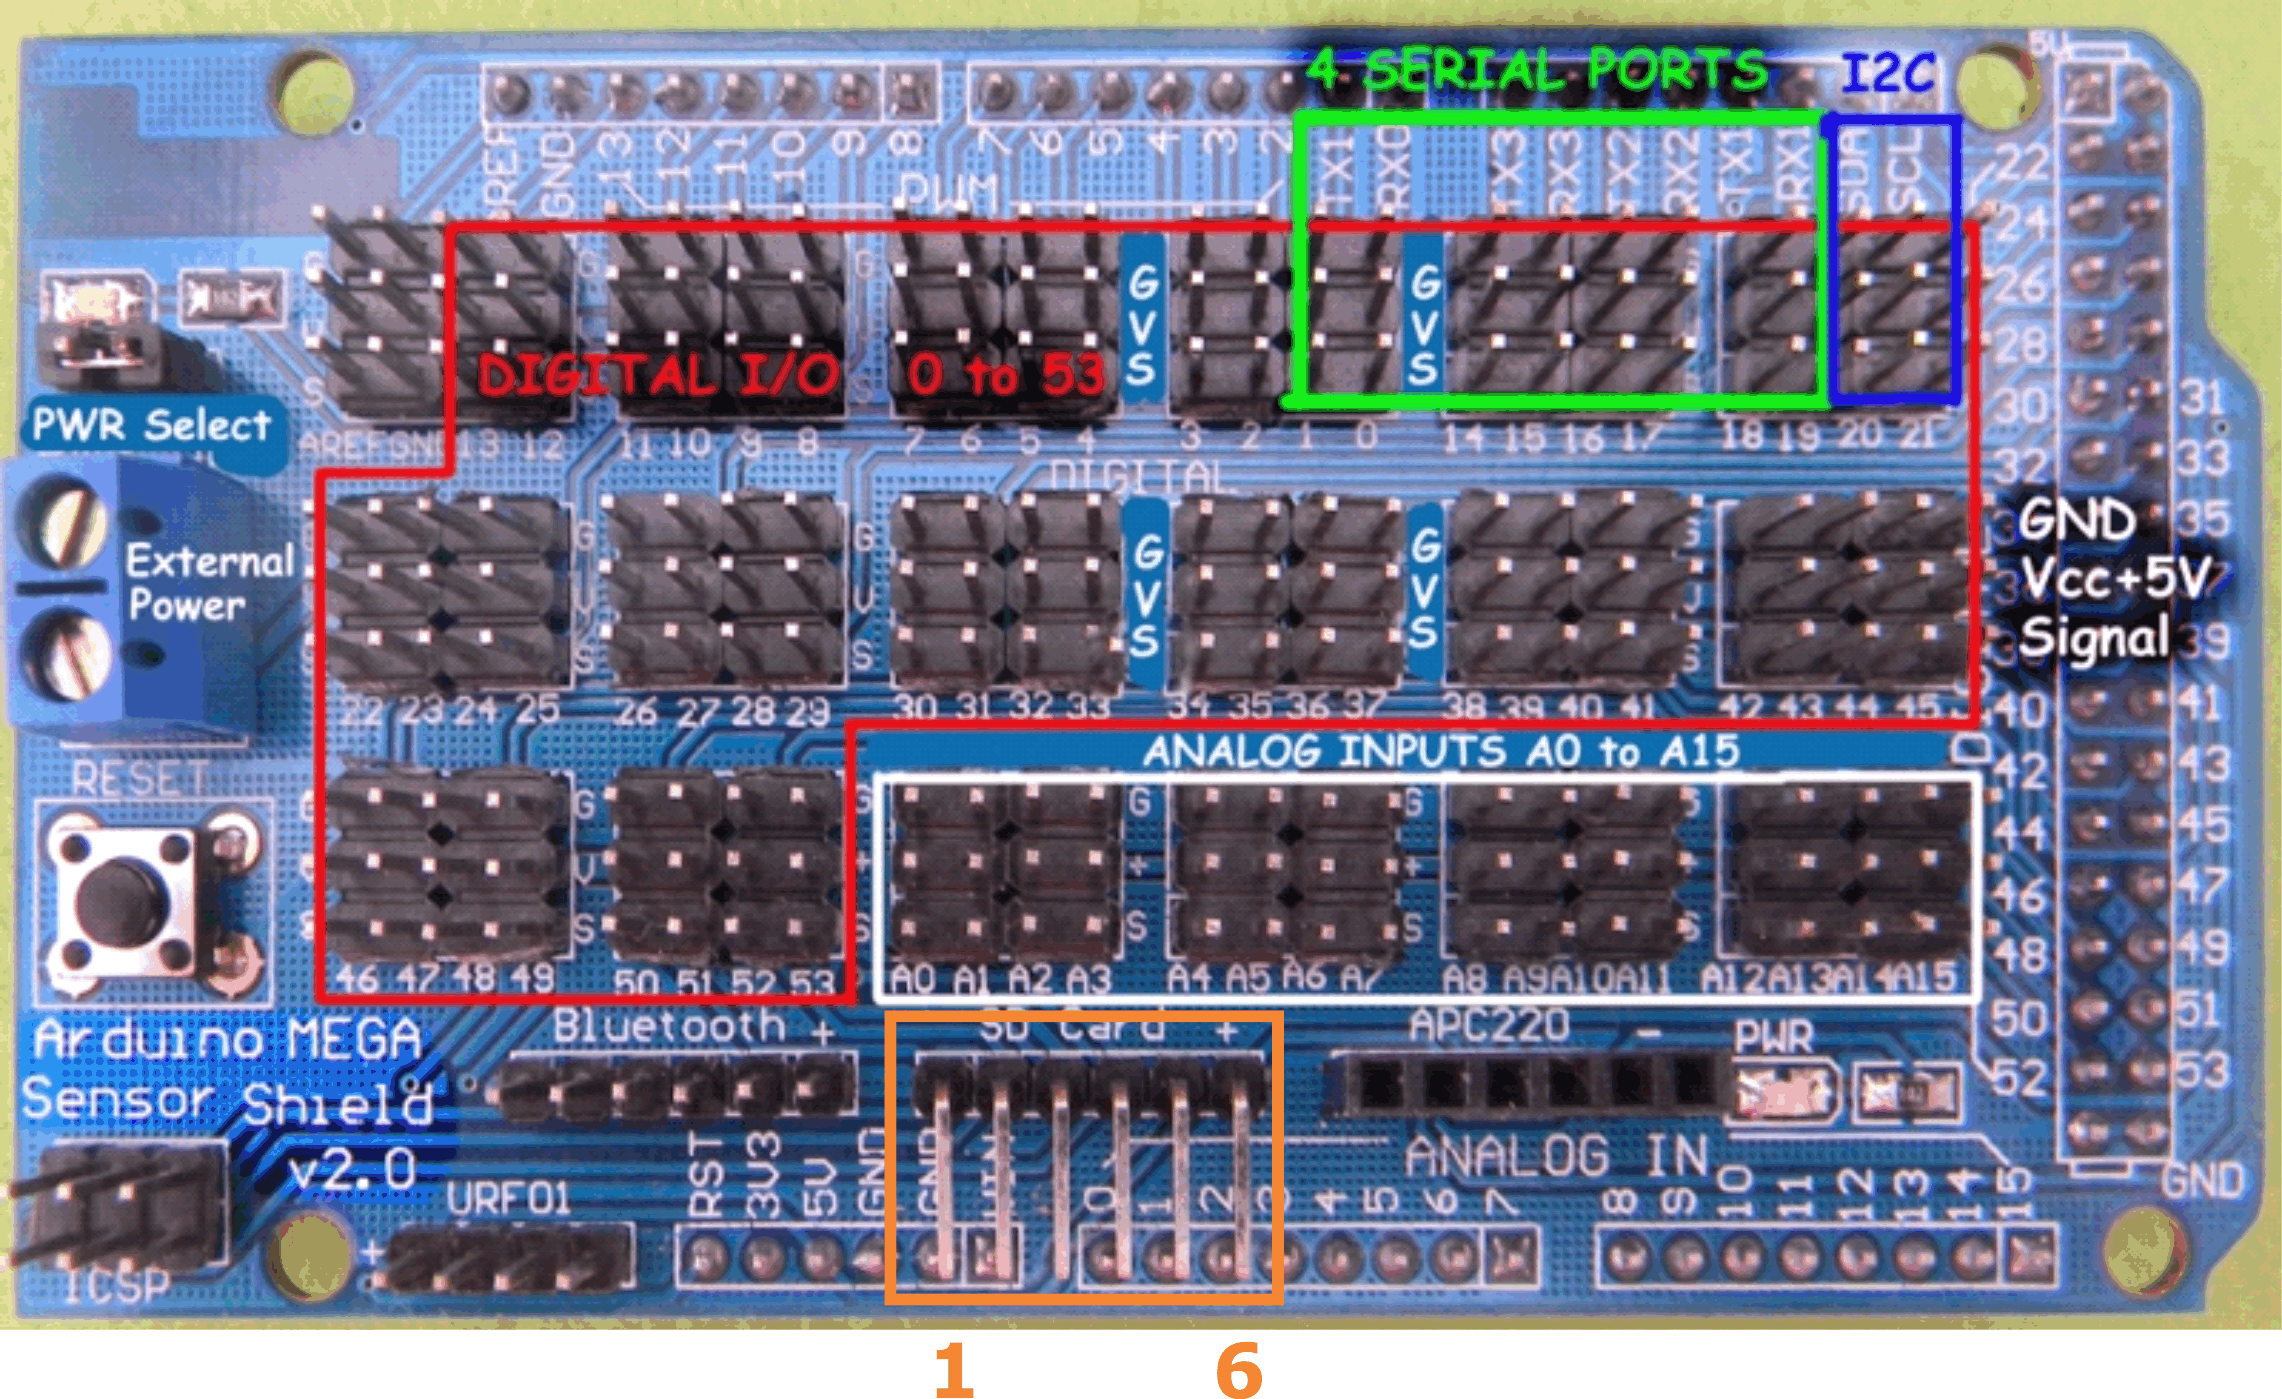
In this tutorial, you will learn how to interface the SD Card Module to the Arduino Mega via a Sensor Shield. Firstly, let's take a close look at the SD card connector on the Mega Sensor Shield.

|
Mega Sensor Shield |
Corresponding |
|
Pin 1 |
50 MOSI |
|
Pin 2 |
52 SCK |
|
Pin 3 |
53 CS / SDCS |
|
Pin 4 |
51 MOSI |
|
Pin 5 |
GND |
|
Pin 6 |
5V |
The 6-pin SD Card connector is actually a SPI bus, and their pin designation is described in the table above.
Of course, the Mega Sensor Shield isn't essential to interfacing the SD Card module to the Arduino Mega, however, it absolutely makes life easier and adds reliability to your device.
There is one important reason why the Arduino Mega is chosen instead of the Arduino Uno (or any Arduino with the ATmega 328 microcontroller). There is only 2 KB of SRAM in the ATmega 328. SD card buffer requires 512 Byts, that's one quarter of the available memory. By putting a few Serial.print functions in the code, it's pretty easy to run out of SRAM in the ATmega 328 before you know it. As SRAM runs out, heap and stack clashes, and your program's behaviour can become strange and inconsistent. As confusing as it can get, it's hard to tell whether it's the 'bug' in the code or short of SRAM, a situation no one wants to go into. On the other hand, the Arduino Mega has 8 KB of SRAM, that's sufficient to most embedded programming, and plenty of room can be left for future improvement / extension.
Download this SD card library into the Arduino/libraries folder.
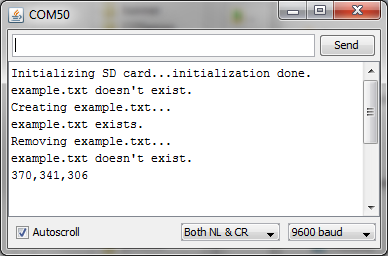
Once it's wired up, download this sketch to the Arduino Mega, make sure you have the correct board and serial com selected. Open the Serial Monitor, and set the Baudrate to 9600, if the SD card is working correctly, you should see something like this.

If it fails to initialize, try the things below:
1. Shut down Serial monitor, unplug the USB cable, wait for about 10 seconds (wait for the capacitors to discharge) , and plug it back again. Start Serial monitor, and push the reset button.
